Saturday, December 31, 2011

New Year's Eve Peanut Butter Cookies

Pin It Now! Happy New Year!  2011 was full of so many blessings and new experiences.  I am excited to see what 2012 brings!  I think I'll usher in the new year with something yummy... because, why not??


These are not your average ho-hum peanut butter cookies.  You see, these are more than peanut butter cookies.  They are soft, chewy peanut butter cookies drizzled with Ghirardelli chocolate.  Ohhhhh yes.  I'd love to meet the genius who first thought to pair chocolate and peanut butter.  That person deserves the first Nobel prize in deliciousness.


This recipe is so simple, yet so good, and I guarantee you have all the ingredients on hand at any given time.  And hey, if you don't feel like messing around with melting chocolate and drizzling (but who wouldn't?!) toss in a cup of chocolate chips and call it a day!  And of course make sure you sample them right out of the oven when they're all melty ooey gooey...  mmmmmm....

Peanut Butter Cookies
1 3/4 c AP flour
3/4 tsp baking soda
1/4 tsp salt
1/2 c (1 stick) unsalted butter, room temp.
3/4 c peanut butter
1/2 c granulated sugar
1/2 c packed brown sugar
1 egg
1 tsp vanilla extract
1 c Ghirardelli semi-sweet chocolate chips

Preheat oven to 350 degrees.  Line a baking sheet with parchment paper or Silpat mat.  Melt the chocolate chips over a double boiler and set aside to cool.

In a small bowl, whisk together flour, baking soda and salt.  Set aside.  Meanwhile, beat butter until light and fluffy.  Add in peanut butter and beat until creamy.  Beat in sugars, egg and vanilla until fully blended.  Add flour mixture and slowly mix until fully incorporated.  Dough will be somewhat crumbly.

Form about 1 tablespoon of dough into a ball for each cookie.  Place a sheet of wax paper over cookies and lightly flatten with your hands.  (Alternately, you can also go the traditional route and flatten with the tines of a fork.)  Bake cookies for 9 minutes, or until just very lightly brown on the edges.  Cool for one minute on baking sheet, then transfer to cooling rack to cool completely.  Drizzle with chocolate once completely cooled.


Photobucket

Friday, December 30, 2011

Our White Christmas in Santa Fe and Dad's Fried Green Tomatoes

Pin It Now! We're back!  I hope your Christmas was joyful and happy.  We spent ours with my family in Santa Fe, New Mexico and had a gorgeous white Christmas.  I have a major fixation with snowmen and on Christmas day we spent a good hour (two?!) making my very first snowman in the back yard.  Aint he cute?!


Mom and I got to spend lots of time together in the kitchen, our favorite, and even tried our hand at making a wreath.  A restaurant in Albuquerque had their wreaths hung flat on the ceilings and it was so pretty!  So we took inspiration from that and hung ours from the dining room chandelier.  Here's the finished product:


Not bad for first timers, eh??

The logs across the ceiling are "vigas," and are very common in Southwestern architecture.
Grandpa C. built the house with his own hands, lifting each end of every (very heavy!) viga himself!
 Now on to the recipe for today...  My dad had told me some time back that he was enjoying green tomatoes from their garden.  Up until about a year ago I wouldn't touch tomatoes of any kind or color with a ten foot pole.  I was always that pain in the neck girl that told the server "I'm allergic" to keep them from tainting my salads with the wretched things.  I'm not sure what prompted my venturing out, but I started giving them a try, and now I don't mind them.  In fact, I kinda like them.  So when Dad mentioned fried green tomatoes, I was intrigued.  The green fruit has a tart, slightly citrus-like flavor.  Dad topped his with creamy goat cheese - yum!

Green tomato tip: Allow them to sit for a day or so to develop a slight "blush." 
Makes for sweeter flavor.

Fried Green Tomatoes
2 green tomatoes
1 1/2 c Italian style bread crumbs (or panko)
1 large egg
1/2 c buttermilk
1 c AP flour

Start by setting up your breading station:  Pour the bread crumbs into a shallow pan (pie pans are great for breading stations) and shake lightly to level.  Pour flour into second pie pan, shaking to level.  In a small bowl or shallow pan, beat the egg and buttermilk lightly.

In a non-stick skillet heat about 3 tbsp of olive oil on medium-high flame.  Preheat oven to 350 degrees.

Slice the green tomatoes to desired thickness (1/2" - 3/4" is ideal).  To bread the tomato slices, dip in this order: Egg, flour, egg, bread crumbs.  Carefully lay in the hot oil and brown on both sides.  Meanwhile, line a baking dish with paper towels.  After tomatoes are browned, place in baking dish and bake until tomatoes are tender (time will vary depending on thickness - check them every few minutes.)  Enjoy!


Merry Christmas from the Montalvo Family!

Photobucket

Wednesday, December 21, 2011

Vanilla Bean Coconut Cupcakes

Pin It Now!

 Happy winter solstice!!  Can you believe that the end of the year is upon us?  I'm a Christmas freak so I'm loving all of the holiday decorations around town.  If I had my way, I'd have an entire room in my house dedicated to year-round Christmas decorations.  Yes, I'm a nut.

We like to do a small potluck and white elephant gift exchange at work, and this year I decided that coconut cupcakes would be a nice winter-y looking dessert to have.  This recipe is originally from Bon Appetit, and while I love the recipe, there are a couple things I would do differently.  First, the cupcakes rise far more than your typical cupcake, so next time I'll fill the cups just under half full (making 24 cupcakes as opposed to the original recipe's suggested 18).  Also, the frosting recipe was only enough to frost 12 cupcakes with a pastry bag, so I'll definitely be doubling. 


The secret to this recipe is the reduced coconut milk.   It keeps the cake soft and makes the icing melt-in-your-mouth silky.  Seriously, I could sit and eat the frosting with a spoon and be perfectly happy.  Maybe with a drizzle of chocolate ganache...  or a sprinkle of cocoa...  ooohh or toasted coconut and shaved dark chocolate...

What were we talking about??

Oh, yes - the cupcakes!

The reduced coconut milk can be made a couple days in advance (so convenient!) and kept in the fridge.  In fact, you could make the whole works in advance and keep the frosted cupcakes in the fridge overnight if needed.  Make sure you bring them to room temperature prior to serving.  Decorate as you see fit - I chose edible glitter to look like snow for my wintery cupcakes.  :)  Enjoy!

Coconut Cupcakes
Source: Bon Appetit
1 1/2 c reduced coconut milk (instructions below)
2 c AP flour
2 1/4 tsp baking powder
1/2 tsp salt
3/4 c (1 1/2 sticks) unsalted butter, room temperature
1 1/3 c sugar
3 large eggs
Seeds from 1 split vanilla bean (alternately: 1 1/2 tsp vanilla extract)
1 c reduced coconut milk

Coconut Frosting
1 c (2 sticks) unsalted butter, room temperature
2 1/2 c sifted powdered sugar
1/3 c reduced coconut milk
Seeds from 1 split vanilla bean (or 1 1/2 tsp vanilla extract)
1/8 tsp salt
Toasted coconut (optional - garnish)

Directions:
For the reduced coconut milk...
To reduce coconut milk, pour two 13.5 ounce cans of coconut milk into a medium saucepan and heat on medium high heat. Bring to a boil (watch it - it'll boil up) and reduce heat slightly.  Allow to boil 25-30 minutes until reduced and syrup-y.  Cool completely.  (Can be made two days in advance.  Keep chilled.)

For the cupcakes...
Preheat oven to 350 degrees.  Line cupcake tins with baking cups and set aside.  Whisk the dry ingredients in a bowl.  Meanwhile, beat butter with electric mixer until smooth.  Add in sugar and beat until well mixed.  Add 2 eggs, one at a time, and beating well after each addition and occasionally scraping down the sides of the bowl with a spatula.  Beat in seeds from vanilla bean and remaining egg.  Add half of flour mixture and beat on low until just combined.  Pour in one cup of reduced coconut milk and blend until just mixed.  Add remaining flour and mix.  Divide the batter among the cups and  bake approx. 20 minutes, or until a cake tester comes out clean.  Cool 10 minutes in baking pans and then carefully remove to cool completely.

For the frosting...
Beat butter until smooth using an electric mixer.  Add in sifted powdered sugar, 1/3 cup of reduced coconut milk, seeds from vanilla bean and salt.  Mix all ingredients well until light and fluffy.  Transfer to a pastry bag and decorate as desired.  (Can be made a day in advance.  Keep chilled.  Bring to room temp prior to decorating.)
Photobucket

Saturday, December 10, 2011

Lemon Scallion Pasta with Shrimp

Pin It Now! Is it really December 10th?!  Eek!  This little elf needs to kick her Christmas planning into high gear!  This year we are spending the holiday in the snow with my family.  We are very much looking forward to our white Christmas!!  (And by "we" I mean Hubby and myself.  Chico isn't so much a snow dog.)  ;)

After running errands this afternoon and trying to get a 6-year-old chihuahua to model for our Christmas photo (yes, we're those people) we needed something quick & simple for dinner.  I remember catching the tail end of an episode of Rachael Ray's 30 Minute Meals a couple of years ago in which she was finishing up a lemony pasta side dish.  I took inspiration from that and customized, adding some shrimp to make it a more hearty meal. I'm so bad about measuring, so these are approximations.  Just fiddle with it until it tastes good to you.  My Hubby likes lots of lemon, so I went a bit heavy.


Lemon Scallion Pasta with Shrimp
1 lb spaghetti
2 c low sodium broth (chicken or vegetable)
1/4-1/2 c low sodium soy sauce
2-3 lemons, zested and juiced
drizzle of olive oil
1 bunch scallions, cut into slices on the diagonal
1/2 lb shrimp

Cook the pasta according to package, draining just shy of al dente.  While the pasta cooks, combine broth, soy sauce, lemon juice and lemon rinds in a small saucepan.  Bring to a simmer and cover, heat off, for about 7 minutes (allowing the lemons to steep.)  As the sauce steeps, saute shrimp in olive oil until pink and opaque.  Toss shrimp into drained pasta.  Pour sauce through a strainer onto pasta and shrimp and toss to coat.  Cover and let sit for 5 minutes.  The pasta will soak up the sauce and finish cooking to the perfect al dente.  Fold in scallions and lemon zest and top with a sprinkle of freshly grated parmesan.


Grow your own scallions!


Photobucket

Wednesday, December 7, 2011

Cranberry Vanilla Bean Scones

Pin It Now! Even though I'm like a kid when  it comes to Christmas excitement, I'm not quite ready to entirely give up fall just yet.  Here in Southern California, summer tends to bleed into our fall and winter months.  It's been shorts & flip-flops weather more than scarf & boot weather lately.  But the mornings and evenings are nice & brisk, so I wanted to whip up something cozy and delicious.  Cranberry scones?  Yes, please.  Madagascar vanilla beans at Trader Joe's?!  Yes, please!!

This recipe can easily be customized - have fun with it!  I promised the Hubby I'd make chocolate chip scones, but with chocolate cake and chocolate pudding in the house, we needed something fresh.  Even chocaholics can get chocolate-d out.  I think.


Cranberry Vanilla Bean Scones
Adapted from Smitten Kitchen
2 1/2 c AP flour
1/2 c + 3 tbsp sugar, divided
1 tbsp baking powder (yes, tablespoon)
1/2 tsp salt
6 tbsp cold, unsalted butter, cut into small pieces
1 1/4 c fresh or frozen cranberries, chopped
1 lg egg + 1 lg egg yolk
1 c buttermilk
1 vanilla bean
Additional sugar

Preheat oven to 400 and line a baking sheet with parchment paper.  Set aside.

In a stand mixer (or food processor) combine flour, 1/2 c sugar, baking powder and salt.  Add in the cold butter pieces and mix until the mixture resembles corn meal and the butter pieces are no larger than a pea.

In a small bowl, toss the chopped cranberries in remaining 3 tbsp sugar.  Mix this into the flour/butter mixture.


In another small bowl, combine the egg, egg yolk, and buttermilk.  Take the tip of a sharp knife and slice the vanilla bean lengthwise.  Scrape out the vanilla beans with the knife and whisk into egg yolk mixture.  Add liquid ingredients to the dry and mix until just incorporated.  Be careful not to over-mix.

(To freeze before baking, flash freeze at this point.  Place the baking sheet with the shaped scones into the freezer until just frozen.  Transfer to a freezer bag and freeze until ready to bake.  To bake straight from freezer, add approx. 5 minutes to baking time.)

Use an ice cream scoop to drop scones onto the parchment-lined baking sheet.  Leave about 2 inches between each one.  Sprinkle the tops with additional sugar and bake 15-20 minutes.

Leftover cranberries?  You *must* make Sparkling Cranberry Brie Bites from Yummy Mummy!


Photobucket

Sunday, December 4, 2011

Chocolate Pudding for Grandpa

Pin It Now! The holidays tend to make me nostalgic.  And treat-crazy.  Every Christmas when I was growing up my mom and I would spend hours in the kitchen making shortbread cookies and fudge, my two favorite Christmas yums.

On Christmas Eve, we would light a fire in the fireplace, read the story of Jesus' birth and then tackle the presents.  I loved waking up Christmas morning to tear into the Santa presents under the tree and spend the day in my pajamas surrounded by wrapping paper mess.

The holidays also make me miss my sweet grandpas.  Both of my grandpas lived good, long lives, and we were blessed to have so many years with them.  Al Chaparro and Jerry La Celle both served their country proudly, and are now laid to rest in National Cemeteries - Santa Fe National Cemetery and Arlington National Cemetery, respectively.

Albert Chaparro

When I think of my Grandpa Chaparro (daddy's dad) the first thing that pops into my mind is his laugh.  He had a very distinct laugh that makes me smile to remember.  He drank his coffee out of the same mug every day - his prized World's Greatest Dad coffee cup.  A tall, strong man with a loving heart, he wasn't much for words a lot of the time, but his stories were mesmerizing.  He had solid faith in God, which he instilled in his children and grandchildren.  The last thing he said to me was, "I love you, too, sweetheart."


Jerry La Celle

My Grandpa La Celle (mom's dad) was a tall, slender man with sparkling blue eyes.  99.9% of the time, you wouldn't see him without a bow tie on.  He loved to sit in his comfy chair and observe the commotion of our large family, and every so often he would "psst" at me and motion for me to come give him a hug.  Even as Alzheimer's robbed him of himself, he looked at a photo of me, said "That's my granddaughter..." and hugged the photo tightly.  And to the end, he loved chocolate pudding.  Six years ago today, he left us.  This recipe is for him.

Chocolate Pudding
2/3 c granulated sugar
2 tablespoons + 1 tsp. cornstarch
1/8 tsp salt
3 c milk (I used 1% cuz it's what we had in the fridge)
4 large egg yolks
1/2 tsp vanilla
3 oz semisweet chocolate, chopped
3 oz bittersweet chocolate, chopped
1/2 tsp cinnamon (optional, but fantastic)
1/2 tsp unsweetened cocoa powder

In a medium saucepan, combine sugar, cornstarch and salt.  Add 1/3 c of the milk, and stir to form a smooth paste.  Whisk in the egg yolks and remaining milk.


Cook the mixture over medium-low heat, stirring constantly, until thickened.  Do not allow to boil.  Remove from heat.  Stir in vanilla, chocolate, cinnamon and cocoa powder until smooth.  Cover and chill at least two hours.
Serve with shaved chocolate, whipped cream, or just dig in like Grandpa would!  Enjoy!


Photobucket

Sunday, November 20, 2011

Slow Cooker Chili & Honey Brown Sugar Cornbread

Pin It Now! Are you ready for Thanksgiving??  I swear just yesterday I was thinking that Halloween was almost here, and now Thanksgiving is staring us in the face.  I'm so excited!  Thanksgiving and Christmas are my favorite holidays of the year.  I can't wait for the Montalvo family to be together again.  Tuesday evening will find me in the kitchen baking up a double batch of pumpkin cranberry cookies.

This morning I woke up to one of my favorite sounds... rain!  Typically I would sleep in on a Sunday morning, but the rain was so beautiful that I was perfectly happy sacrificing sleep for cuddling with Chico and listening to the drops fall on the roof. 

Rainy days call for comfort food.  Something that will fill the house with yummy smells while bubbling away on the stove - or in this case, the crock pot.  (The crock pot gets a lot of love during the chilly months.)  This chili recipe is simple, easy and definitely qualifies as comfort food.  This would be great as a vegetarian chili; leave out the meat and toss in some seasonal squash and voila!  Or sub chicken for the beef for a lighter dish.  I think next time I'll add in some diced green chiles for a little variety.


Slow Cooker Chili
1-2 lbs stew meat, trimmed
1 large bell pepper (any color)
1 medium onion, chopped
2 cloves garlic, minced
1-2 tbsp chili powder
1 tbsp ground cumin
2 tsp ground oregano
1 tsp cinammon
1 tsp cayenne pepper
salt & pepper
2 cans beans (any variety you like.  Drain & rinse one can)
3 cans diced tomatoes (preferably low sodium)

Heat a tablespoon of oil in a large skillet on high heat. Saute stew meat, bell pepper, onion and garlic for 5 minutes, or until the meat starts to brown on all sides.  Add in chili powder, cumin, oregano, cinammon, cayenne pepper, salt and black pepper.  Let cook for a couple minutes more.  In the meantime, pour tomatoes and beans into the crock pot and turn on high.  Add meat and veggies to the crock pot and stir to mix.  Cook on high 6-8 hours, stirring occasionally.

Honey Brown Sugar Cornbread
1 prepared recipe for cornbread (I cheated and used the Trader Joe's cornbread mix)
1 tbsp honey
1 tbsp packed brown sugar

Stir honey and brown sugar into cornbread mix and bake as directed.  There, wasn't that a complicated "recipe"?  The leftovers are great to dry for croutons!


Photobucket

Thursday, November 17, 2011

Ginelle's "June Cleaver" Chocolate Cake

Pin It Now! A couple of weeks ago, my friend Ginelle surprised me with the most stunning scrapbook I have ever laid my eyes on.  Ginelle is extremely creative and unbelievable talented when it comes to scrapping (not to mention cooking and pretty much everything else!)  Any time she would share her latest project with me I was always blown away.

Well let me tell you...  she really outdid herself this time.

She created every element of this scrapbook herself, right down to the pages, literally hand cutting the heart shape over and over for each page.  We share a love for all things Twilight, and the paper she found for this project is undoubtedly very Twilight-esque... deep reds, black gothic details... very romantic.  My bumbling words don't do this piece justice (neither do my photos).  It is absolutely one of the most beautiful gifts I have ever received and one that will be cherished.


On to the cake...  Last year when I asked Ginelle what kind of cake she wanted for her birthday, she answered, "A homemade, very June Cleaver-y chocolate cake."  And I knew exactly where I would go for just such a cake.

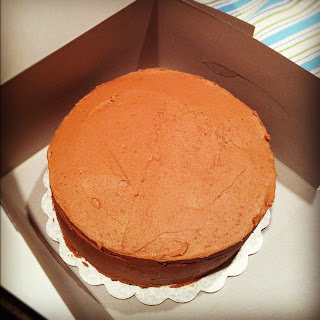
Ina Garten's cookbook, "Barefoot Contessa At Home", features this decadent cake.  It is, without a doubt, the absolute best chocolate cake you will find anywhere.  Trust me.  I've eaten a lot of chocolate cake from a lot of different places, and this is the real deal. I've never come across a cake that stays as moist as this cake, and the buttercream is sinfully rich.  Note: the recipe for the buttercream calls for an egg yolk to give more depth to the flavor and give the icing a nice shine.  I leave this out as most people aren't comfortable with the idea. 

Ginelle loved this cake, so what better way can I say "thank you" than with her very own June Cleaver chocolate cake?  :)

Always make sure your ingredients are at room temperature (yes, even the eggs and buttermilk).  It truly does make a difference.

Ginelle's "June Cleaver" Chocolate Cake
from Ina Garten
1 3/4 c flour
2 c granulated sugar
3/4 c cocoa powder
2 tsp baking soda
1 tsp baking powder
1 tsp salt
1 c buttermilk
1/2 c vegetable oil
2 large eggs
1 tsp vanilla
1 c hot coffee

Preheat oven to 350 degrees.  Butter two 8" round cake pans and line with parchment.  Butter the parchment.  Dust pans with flour.

In your mixer, combine flour, sugar, cocoa powder, baking soda, baking powder and salt on low speed.  In a separate bowl whisk together the buttermilk, oil, eggs and vanilla.  Carefully beat the wet ingredients into the dry until just incorporated.  Then (SLOWLY!) mix in the hot coffee.  Divide batter evenly between both prepared pans.

Bake for 30-35 minutes, or until a toothpick comes out clean.  Cool for 30 minutes in the pans, then invert onto cooling racks.  Once cakes are completely cooled, frost with chocolate buttercream.

Chocolate Buttercream
6 oz semi-sweet chocolate, chopped
1/2 lb (2 sticks) unsalted butter - softened
1 lg egg yolk (optional)
1 tsp vanilla
1 c + 1 tbsp sifted powdered sugar
1 tbsp instant coffee granules, dissolved in 2 tsp hot water

Melt chocolate and set aside to cool.  In mixer bowl, beat butter until light and fluffy.  Add in egg yolk and vanilla and beat for one minute, scraping down the side of the bowl with a spatula.  Slowly beat in the confectioner's sugar on low speed (unless you want a sugar storm!).  Add the coffee and chocolate and beat until fully incorporated.

Set one layer of the cake on a cake stand, flat side up.  Spread 1/3 of the buttercream across the top.  Add the second cake layer and frost with remaining buttercream.  Summon all your willpower not to immediately dive into the cake.  Enjoy!!


I promise this isn't waiting for you in that cake box, G ;)


Photobucket

Sunday, November 13, 2011

{Healthy!} Oven Crisped Slow-Cooker Carnitas

Pin It Now! I know "healthy carnitas" seems like an oxymoron, but hear me out.  Carnitas - literally translated "little meats" -  is a braised pork shoulder that is shredded and then fried in lard until the top is crispy.  I'd rather not feed my hubby a plate full of lard, so I had to come up with a more health conscious method.

Thanks to my beloved crock pot, putting this together literally took five minutes.  Several hours later the meat was fork tender and easy to shred, so dinner was a snap!  I didn't measure my spices, so I'd guess that I used about 2 tsp of cumin and coriander. 


Slow Cooker Carnitas
1 4-lb pork shoulder
ground cumin
ground coriander
salt & pepper
cinnamon (about 1 tsp)
cayenne pepper (about 1 tsp)
2 garlic cloves, roughly chopped
1/2 medium onion, roughly chopped
2-3 bay leaves
1-2 c chicken broth

Let the pork come to room temperature for 30 minutes.  Sprinkle the cumin, coriander, salt, pepper, cinnamon and cayenne pepper on all surfaces of the meat.  Pour about 2 inches of broth in the crock pot and carefully lay the pork shoulder in.  Toss in the garlic, onions and bay leaves.  Cook on high for 6-7 hours, turning the meat halfway through.


Once the meat is cooked, place it in a 9x13 baking pan (or on a baking sheet) and shred with two forks.  Spread the meat out in an even layer and crisp in a 400 degree oven for 10-15 minutes.  Spoon some of the cooking liquid over the meat when it comes out of the oven and squeeze half of a lime over the whole pan.  Serve in burritos, burrito bowls, tacos, nachos... whatever you like!  We made burrito bowls with cilantro rice and pico de gallo.  Enjoy!

Sous chef :)


Next Day Update
Round Two: Breakfast for dinner...  carnitas hash!  Top skillet potatoes with carnitas and fried egg.  YUMM!


Photobucket